Hello everyone. I baked my first sourdough loaves and while the bread was tasty (especially slathered with some nice salted butter) I think it was more valuable as a learning experience.
The recipe I followed is more like a formula and is known as the 1, 2, 3 formula on several websites. It was devised by a French food blogger named Flo Makanai, who introduced it to American sourdough bakers out of curiosity to see if her formula worked with american style flours. You may see her original post in English here: http://www.thefreshloaf.com/node/9346/123-easy-formula-sourdough-bread
A few bakers have tried her formula, but the one whose example I followed was blogger and baker Shiao Ping on sourdough companion. http://sourdough.com/recipes/home-bread
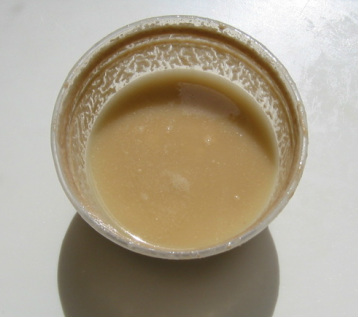
As a novice sourdough baker I still have quite a bit of learning to do. The main question for me is regarding the timing of feeding the starter and then using the starter. For this initial attempt at baking I decided to just use my starter pretty much straight out of the fridge. I had fed it on Wednesday night and I was baking on a Saturday. That morning I had to go run some errands, so I pulled the liquid starter out of the fridge and let it sit on the counter for a couple hours while I was out. When I returned home I decided to make two loaves, one using the liquid starter and one using the sponge starter. Hence, the sponge starter did not get a chance to come up to room temperature before I used it.
I wanted to make 1.5 pound loaves, so using the 1,2,3 formula the ingredients were as follows for each loaf:
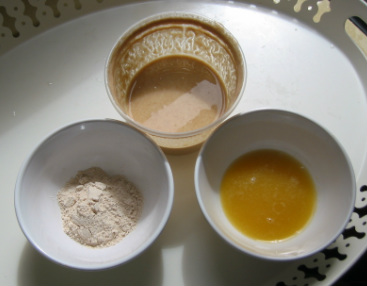
4 ounces by weight starter
8 ounces by weight warm water
12 ounces by weight whole wheat flour (I used Bob's Red Mill)
1 generous teaspoon salt (I used Real Salt)
Hence forth all steps were carried out twice, once for Dough 1 (liquid starter) and again for Dough 2 (sponge starter).
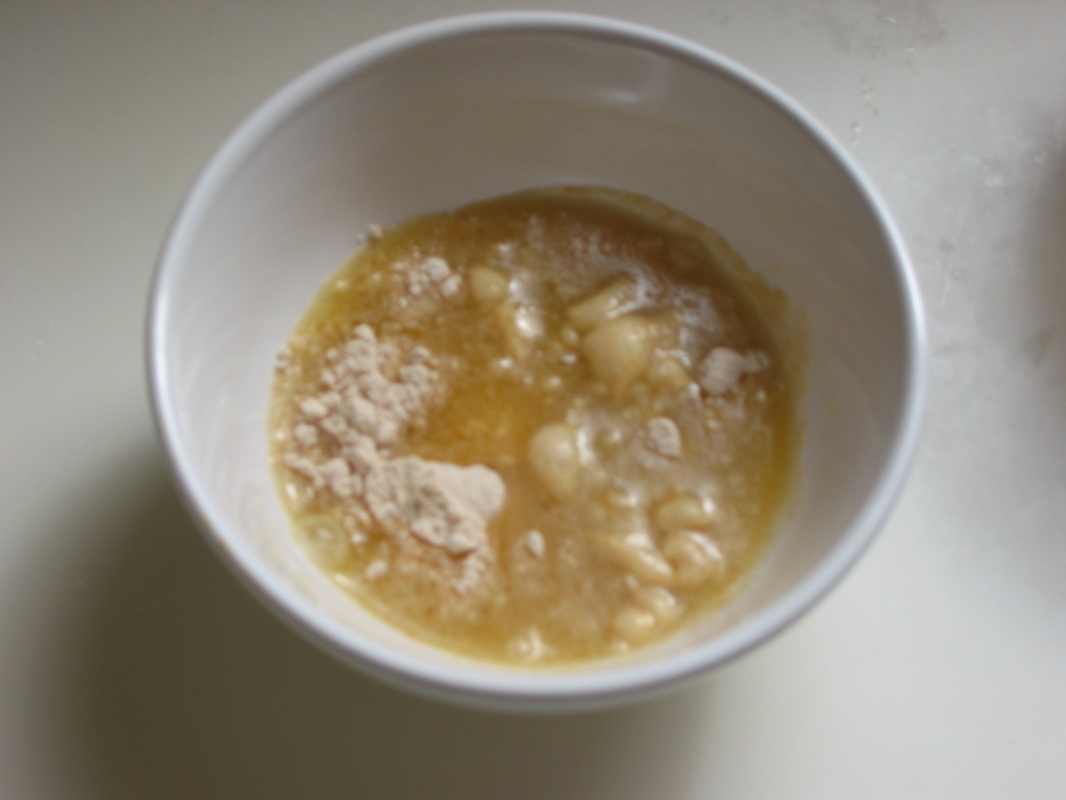
I stirred up the liquid starter and weighed out 4 oz. and poured 8 oz of warm water on top. I stirred that up until it was a thin slurry and then mixed in the flour. I covered it and set it in my oven with the light on for half and hour. This is the "autolyse" period, where the goal is for the flour to absorb the liquid.
I did the same for the sponge starter (which I believe is 75% hydration) except I had to cut it into little pieces and then smush it in the water with my fingers.
After half an hour I did some stretch and folds of the dough within the bowls. I did not count how many, but I did it until it seemed to resist. I oiled the bowls, turned the doughs, covered and stored in the oven.
Every hour for 3 hours I stretched and folded the doughs, but I think I was too rough and ended up kneading out most of the gas bubbles. Dough 1 was softer and easier to stretch, while Dough 2 retained more of its shape and it was easy to see the folds. They both rose and had nicely sized bubbles.
At the end of the 3 hours I let the doughs sit for another half hour, Then shaped them into batards. I don't have any fancy proofing baskets, so I just used a couple plastic containers and lined them with floured cotton cloth. The batards proofed for a final two hours.
At this point I realized I had deflated my dough and that the final proof was probably not going to restore the rise. Ah well.
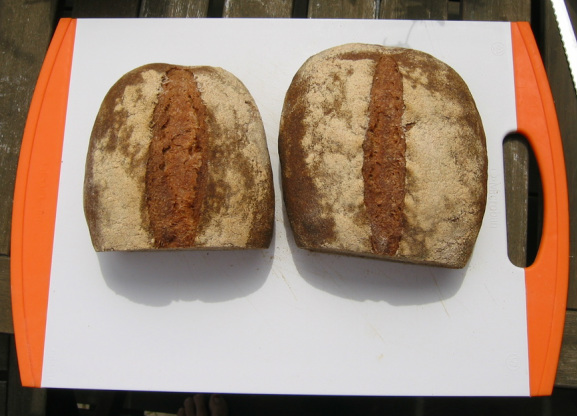
When It was time to bake I preheated my oven to 500 degrees with an old pan in the bottom. I placed the batards on a cookie sheet, slashed them down the middle with a razor, and measured out a cup of water. I slid the cookie sheet into the oven, threw the water at the hot pan in the bottom, sloshed most of the water onto the floor of the oven, and shut the door. I lowered the heat to 450 degrees and baked the loaves for 35 min. I pulled them out, checked the temperature with a probe thermometer and they measured 211 degrees. My target was 200, but 211 is acceptable.
I let the batards sit for 3 hours before slicing them.
The recipe I followed is more like a formula and is known as the 1, 2, 3 formula on several websites. It was devised by a French food blogger named Flo Makanai, who introduced it to American sourdough bakers out of curiosity to see if her formula worked with american style flours. You may see her original post in English here: http://www.thefreshloaf.com/node/9346/123-easy-formula-sourdough-bread
A few bakers have tried her formula, but the one whose example I followed was blogger and baker Shiao Ping on sourdough companion. http://sourdough.com/recipes/home-bread
As a novice sourdough baker I still have quite a bit of learning to do. The main question for me is regarding the timing of feeding the starter and then using the starter. For this initial attempt at baking I decided to just use my starter pretty much straight out of the fridge. I had fed it on Wednesday night and I was baking on a Saturday. That morning I had to go run some errands, so I pulled the liquid starter out of the fridge and let it sit on the counter for a couple hours while I was out. When I returned home I decided to make two loaves, one using the liquid starter and one using the sponge starter. Hence, the sponge starter did not get a chance to come up to room temperature before I used it.
I wanted to make 1.5 pound loaves, so using the 1,2,3 formula the ingredients were as follows for each loaf:
4 ounces by weight starter
8 ounces by weight warm water
12 ounces by weight whole wheat flour (I used Bob's Red Mill)
1 generous teaspoon salt (I used Real Salt)
Hence forth all steps were carried out twice, once for Dough 1 (liquid starter) and again for Dough 2 (sponge starter).
I stirred up the liquid starter and weighed out 4 oz. and poured 8 oz of warm water on top. I stirred that up until it was a thin slurry and then mixed in the flour. I covered it and set it in my oven with the light on for half and hour. This is the "autolyse" period, where the goal is for the flour to absorb the liquid.
I did the same for the sponge starter (which I believe is 75% hydration) except I had to cut it into little pieces and then smush it in the water with my fingers.
After half an hour I did some stretch and folds of the dough within the bowls. I did not count how many, but I did it until it seemed to resist. I oiled the bowls, turned the doughs, covered and stored in the oven.
Every hour for 3 hours I stretched and folded the doughs, but I think I was too rough and ended up kneading out most of the gas bubbles. Dough 1 was softer and easier to stretch, while Dough 2 retained more of its shape and it was easy to see the folds. They both rose and had nicely sized bubbles.
At the end of the 3 hours I let the doughs sit for another half hour, Then shaped them into batards. I don't have any fancy proofing baskets, so I just used a couple plastic containers and lined them with floured cotton cloth. The batards proofed for a final two hours.
At this point I realized I had deflated my dough and that the final proof was probably not going to restore the rise. Ah well.
When It was time to bake I preheated my oven to 500 degrees with an old pan in the bottom. I placed the batards on a cookie sheet, slashed them down the middle with a razor, and measured out a cup of water. I slid the cookie sheet into the oven, threw the water at the hot pan in the bottom, sloshed most of the water onto the floor of the oven, and shut the door. I lowered the heat to 450 degrees and baked the loaves for 35 min. I pulled them out, checked the temperature with a probe thermometer and they measured 211 degrees. My target was 200, but 211 is acceptable.
I let the batards sit for 3 hours before slicing them.
Assessment:
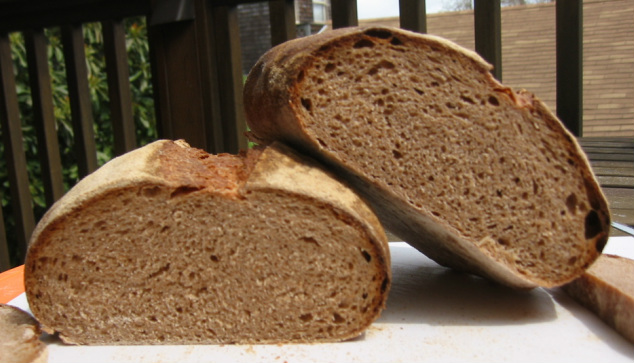
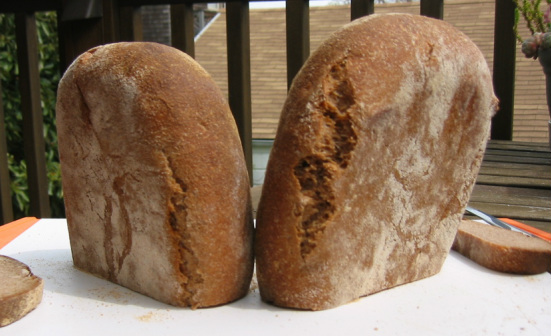
The bread had a very dark brown crust and a very dense crumb. The batard from Dough 1 was flatter than the one from Dough 2. The flavor was identical. The bread was hearty and not sour, which is fine with me. I prefer less sour bread. The crust was crunchy and chewy. Batard 2 had a better tear at the slash when baked, but both loaves cracked at the edges. I don't know if that is because I didn't slash deep enough, or if I baked it at too high a temperature.
The bread had a very dark brown crust and a very dense crumb. The batard from Dough 1 was flatter than the one from Dough 2. The flavor was identical. The bread was hearty and not sour, which is fine with me. I prefer less sour bread. The crust was crunchy and chewy. Batard 2 had a better tear at the slash when baked, but both loaves cracked at the edges. I don't know if that is because I didn't slash deep enough, or if I baked it at too high a temperature.
Next time I will be more careful when stretching and folding. I also will feed up the starter more before baking. I also might try baking the loaf in a dutch oven, or using ice cubes in the oven for steam, rather than water.


 RSS Feed